In this Adobe Photoshop tutorial i will show you how to turn a new photo into an old photo.


And set up following levels presets:


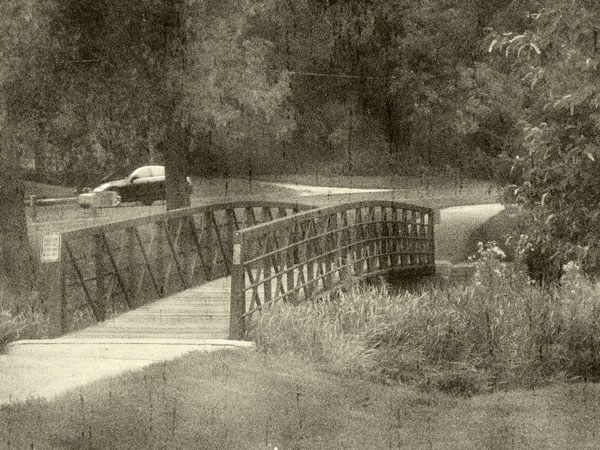


Final Image Preview
Resources
Step 1
Start by opening photo. Go to Image > Image size to reduce photo size to 1000px width and 750px height.Step 2
We are going now to create noise effect. Create new layer, press D to set up foreground and background colors as black and white and then apply Filter > Render > Clouds.Step 3
After that apply Filter > Noise > Add Noise with next presets:Step 4
Change layer mode to Soft Light for this layer.Step 5
Now we are going to create light sepia effect. For this purpose I created new layer above and fill it with color of #e6e1cc.Step 6
Then change layer mode to Color and you should get next effect.Step 7
After that create additional layer with Layer > New Adjustment Layer > Levels:And set up following levels presets:
Step 8
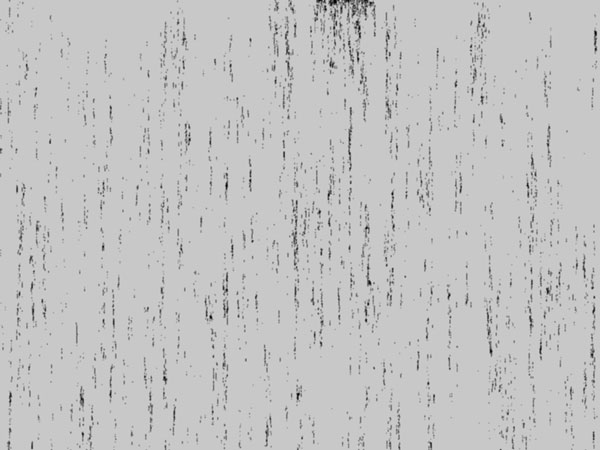
To add scratches to the photo create new layer, press D to set up foreground and background colors as black and white and then apply Filter > Render > Clouds again.Step 9
Apply Filter > Render > FibersStep 10
Now apply Image > Adjustments > Threshold:Step 11
Now apply Image > Adjustments > Threshold:Step 12
Apply again Filter > Blur > Blur More.Step 13
Change layer mode to Soft Light and you will see the difference.Step 14
Reduce layer opacity to 70%.Step 15
Create a new layer. Select Gradient Tool, select some appropriate colors, for example colors of #e5e5e5, #000000 and drag a radial gradient.Final Image
After that change layer mode for this layer to Overlay and tutorial is complete.


0 comments:
Post a Comment