Understanding transparencies
Director's ink effects allow you to apply a variety of transparencies to sprites. Two of these are: Background Transparent - all white pixels in a bitmap image or background in animated gif or vector graphics, are made transparent (as shown in the top circle in the image on the right).
Matte - all white pixels not enclosed by coloured pixels are transparent (as shown in the bottom circle in the image on the right).
 In the above two situations, only white pixels can be made transparent. This can be a problem for bitmap images with anti-aliased edges. In the image on the right, the red circle has an anti-aliased edged. If you zoom into the edge of the image (as shown), you will notice that the red pixels blend into the white background. By having this fade from red to white, the edge of the circle looks softer than the pixilated circles shown in the top two circles.
 Formatting Images in PhotoShop
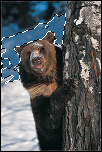
The bulk of this tutorial will be setting up our image in PhotoShop. We will be using a picture from PhotoShop's sample folder of a bear (that came with PS 6). Here it is for you to download bear.bmp. In this tutorial, I'm also going to do a few things wrong or maybe in a less than ideal way, to show you how they can affect the quality of the image.1. Open bear.bmp in PhotoShop.
2. Click on the magic wand tool
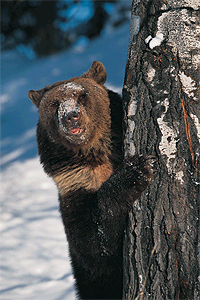
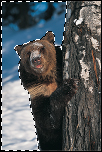 3. Click on the blue part of the background as shown in the image on the right.
4. Press Shift and click on other parts of the background until you have selected the entire background as shown in the far right image.
Clicking on the Shift key allows you to add to a selection.
The Alt key allows you to remove parts from your selection.
5. Make sure the background colour is set to white and then press Delete to erase this background area.
6. Create a new layer by choosing Layer > New > Layer...
7. Choose Select > Inverse.
To make sure we remove edge background pixels that may not have been selected, we'll shave off another pixel from our selection.
8. Choose Select > Modify > Contract... and enter 1 pixel to Contract By.
9. To soften the edge slightly more, choose Select > Feather and then enter 1pixel as the Feather Radius.
10. Choose Edit > Fill... and then choose Black.
You have now created a mask image.
11. Hide the mask layer and then choose Image > Mode > Indexed Color...Click OK to Merge visible layers and discard hidden layers.
12. In the Palette option select Local (Adaptive) and in the Colors option enter16. Leave all other settings. Press OK.
We're now going to switch to Director, so fire her up. I'm also going to show you a shortcut in importing images.
13. With both Director and PhotoShop open, in PhotoShop, select the entire image by choosing Control + A (Windows) or Command + A (Mac).
14. Press Control + C (Windows) or Command + C (Mac) to copy the graphic.
15. In Director, in the cast window, Press Control + V (Windows) or Command + V (Mac) to paste. You will be prompted for the image options, choose Image (4 bits) for the Color Depth and Import the Palette.
16. Switch back to PhotoShop, and go to Window > History.
17. Click on the item just before you indexed the colours.
18. Click on the Layer tab and click on the mask layer
19. Copy and paste this layer into Director into cast slot 3 as in steps 13 to 15. This time you won't be asked for image options.
We did not index the colours of the mask in PhotoShop. Since we want it to be a grayscale image and this palette is included in Director, we can convert it to in Director.
20. Click on the mask cast member and choose Modify > Transform Bitmap....
21. Change the Color Depth to 4 Bits and the Palette to Grayscale. PressTransform.
4 bits allows 16 colours, which is sufficient for our purpose.
To make sure our mask and main image align to each other, we'll modify their registration points.
22. Double click the bear image to open it in the Paint Window.
 23. Click on the Registration Point icon
 24. Do the same as above for the mask image .
26. Change the stage colour to a dark blue.
27. Change the sprite's ink to Matte.
You will notice the what looks like white pixels around the image. 28. Now change the sprite's ink to Mask and look at the difference.
Note: The mask ink effect requires the mask image to be in the next cast slot after the image it is set to mask. If you placed the mask image in slot 4 with the main image in slot 2, it would not work.
The result of this tutorial can be downloaded from here - mask.dir.
By the way, the Matte may look worse than when you did it. I deliberately did things to make the white pixelation more noticeable.
What we did wong / what could have been done differently?
You may notice that while this creates a softer edge, we now have a slight smoky halo around the image. This is due to the fact that we deleted the background of the main image and due to the use of feathering. By doing these things, we created an anti-aliased edge fading to white. The mask image makes the edge pixels semi-transparent. But what it is doing is making pixels that are fading to white semi transparent. So, that's why we get some of that whitish look coming through. This is more noticeable when feathering the edge of a graphic.When we first started selecting the background, we could have chosen not to have anti-aliasing applied to the selection. That way, when it was deleted, it would not anti-alias the edge of the bear to white. What we could have done is not delete the background at all but simply make a mask.
Try this tutorial again, without deleting the background from the main image and see the difference. Also try it without feathering.
Try it with more feathering and white a non white background - look at what I did here to create a yellow glow.


0 comments:
Post a Comment